DIY Solar Installation: Step-by-Step with Safety Tips
Imagine powering your entire backyard with sunshine, slashing your electricity bill, and knowing exactly where every watt of energy comes from. That’s the power of DIY solar, and it’s more attainable than you might think. This guide provides a practical, step-by-step approach to DIY solar installation, complete with crucial safety tips to ensure your project is both successful and safe. From small solar lights to full-fledged off-grid systems, we’ll cover everything you need to know.
Why should you consider taking the DIY solar plunge? Beyond the obvious financial benefits, installing your own solar system gives you unprecedented control over your energy consumption. You’re not just saving money; you’re building energy independence. Plus, DIY allows you to customize your system to your specific needs, whether it’s a small system for charging devices or a larger one for running appliances. More importantly, understanding the ins and outs of your solar system empowers you to troubleshoot issues and maintain it effectively, ensuring its longevity and maximizing its performance.
Start small! Today, take a look at one area of your home where you could easily incorporate solar – maybe swapping out your porch light for a solar-powered version. It's a simple, low-risk way to get familiar with solar technology.
DIY Solar Installation: A Step-by-Step Guide
Embarking on a DIY solar installation project requires careful planning and execution. It's not just about slapping panels on your roof; it's about understanding your energy needs, choosing the right equipment, and ensuring a safe and efficient installation. This step-by-step guide will walk you through the process, providing the knowledge and confidence you need to tackle your solar project.
Step 1: Assess Your Energy Needs and Goals
Before you even think about buying panels, take stock of your current energy usage. Review your electricity bills for the past year to get an idea of your average consumption. Consider your goals: are you looking to offset some of your electricity usage, go completely off-grid, or simply power a few appliances? This will determine the size and type of solar system you need. Tools like Kill-A-Watt meters can help you pinpoint the energy consumption of individual devices.
Step 2: Plan Your System Design
Once you know your energy needs, you can start planning your system. This involves determining the number of solar panels you need, the type of inverter, the size of your battery bank (if you're going off-grid), and the mounting hardware required. Many online solar calculators can help you estimate the size of your system based on your location, energy consumption, and available sunlight. Consider the orientation of your roof (south-facing is ideal in the northern hemisphere) and any potential shading from trees or buildings.
Step 3: Gather Your Tools and Materials
A successful DIY solar installation requires the right tools and materials. You'll need solar panels, an inverter (grid-tied or off-grid), batteries (for off-grid systems), wiring, mounting hardware, a charge controller (for off-grid systems), electrical conduit, and safety equipment. Essential tools include a multimeter, wire strippers, crimpers, a drill, a socket set, and a torque wrench. Renting scaffolding may be necessary for roof installations, and it's always advisable to have a helper.
Step 4: Obtain Necessary Permits and Inspections
This is a crucial step that many DIYers overlook. Contact your local building department to determine the permits required for your solar installation. Failure to obtain the necessary permits can result in fines and even require you to remove your system. Adhering to electrical codes ensures the safety and legality of your setup.
Step 5: Install the Mounting Hardware
With the permits in hand and tools ready, begin installing the mounting hardware for your solar panels. This typically involves attaching racking systems to your roof or ground. Ensure the mounting hardware is securely fastened and properly aligned. Take extra care to avoid damaging your roof during the installation process. Consult the manufacturer's instructions for the specific mounting hardware you're using.
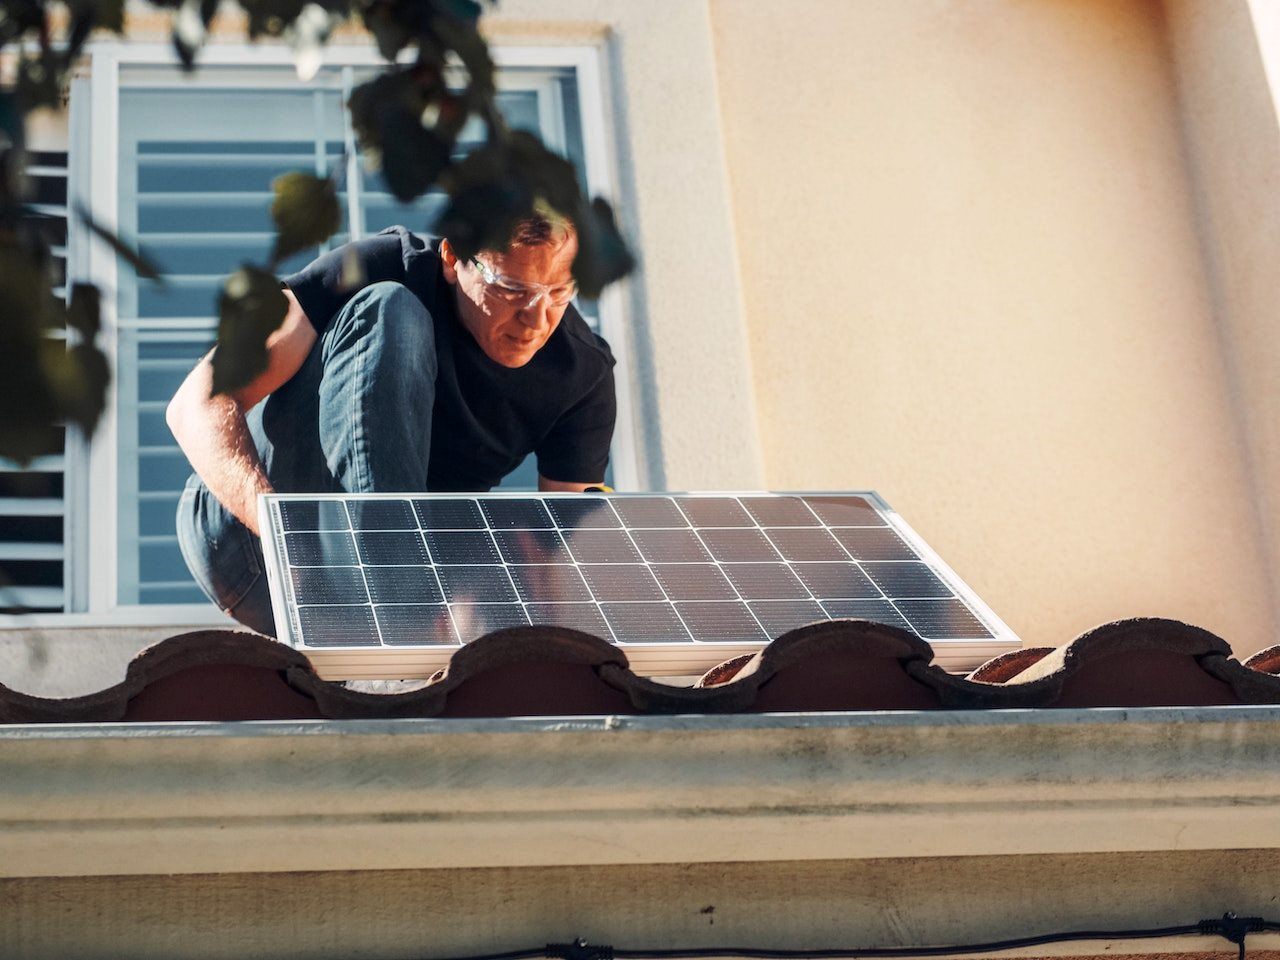
Step 6: Mount the Solar Panels
Once the mounting hardware is in place, carefully attach the solar panels. Connect the panels in series or parallel, depending on your system design and the voltage requirements of your inverter. Use appropriate wiring and connectors designed for solar applications. Secure all connections and ensure the panels are properly grounded.
Step 7: Install the Inverter and Battery Bank (if applicable)
The inverter converts the DC power from the solar panels into AC power that can be used by your appliances. Install the inverter in a dry, well-ventilated location. If you're using a battery bank for energy storage, connect the batteries to the charge controller, which regulates the flow of electricity between the solar panels, batteries, and inverter.
Step 8: Connect the System to Your Electrical Panel
This step requires extreme caution and is often best left to a qualified electrician. You'll need to connect the inverter to your electrical panel, ensuring proper grounding and circuit protection. This involves installing a dedicated circuit breaker for the solar system and following all local electrical codes.
Step 9: Test and Monitor Your System
After the installation is complete, thoroughly test your system to ensure it's functioning correctly. Use a multimeter to check the voltage and current output of the solar panels. Monitor the system's performance over time to identify any issues and optimize its efficiency. Many inverters have built-in monitoring systems that provide real-time data on energy production.
Safety First: Crucial Tips for DIY Solar Projects
Working with electricity, heights, and heavy equipment can be dangerous. Prioritizing safety throughout your DIY solar installation is paramount. Always wear appropriate personal protective equipment (PPE), including safety glasses, gloves, and a hard hat. Work with a partner, especially when working at heights. Never work on electrical components when they are energized. If you're unsure about any aspect of the installation, consult a qualified electrician.
Off-Grid Adventures: Solar Kits and Battery Storage
For those looking to achieve complete energy independence, off-grid solar systems offer a viable solution. Solar kits provide a convenient and cost-effective way to get started with off-grid solar. These kits typically include solar panels, an inverter, a charge controller, and wiring, all designed to work together seamlessly. When selecting a solar kit, consider your energy needs, budget, and the quality of the components. Battery storage is essential for off-grid systems, allowing you to store excess solar energy for use during periods of low sunlight. Lithium-ion batteries are a popular choice due to their high energy density and long lifespan.
DIY Solar Heating Systems: An Efficient Upgrade
Beyond electricity generation, solar energy can also be harnessed for heating purposes. DIY solar water heaters are a relatively simple and cost-effective project. These systems use solar collectors to heat water, which can then be used for domestic hot water or space heating. DIY solar pool heaters are another popular option, extending your swimming season and reducing your energy bills.
Troubleshooting and Maximizing Your DIY Solar Setup
Even with careful planning and execution, issues can arise with your DIY solar system. Reduced energy output, blown fuses, and tripped circuit breakers are common problems. Start by checking all connections and ensuring the solar panels are clean and free of debris. Use a multimeter to test the voltage and current output of the solar panels. If you suspect a wiring issue, carefully inspect all wiring and connections, ensuring they are properly insulated and grounded. If you're unable to resolve the issue yourself, consult a qualified electrician. To maximize your system's efficiency, ensure the solar panels are properly oriented and free of shading. Regularly clean the panels to remove dust and debris.
Seasonal Considerations for DIY Solar
The performance of your solar system will vary depending on the season. During the summer months, you'll typically generate more electricity due to longer days and higher sunlight intensity. In the winter, energy production will be lower due to shorter days and cloud cover. Account for these seasonal variations when planning your system and consider adding battery storage to ensure a reliable power supply throughout the year. In colder climates, be mindful of snow accumulation on your solar panels, which can significantly reduce their output.
DIY Solar Lights: Start Small, Save Big
Solar lights are a fantastic entry point into the world of DIY solar. These easy-to-install lights require no wiring and can be used to illuminate pathways, gardens, and outdoor spaces. They're a great way to reduce your electricity consumption and add a touch of green energy to your home.
Does my location affect DIY solar?
Yes, your geographic location significantly impacts the feasibility and efficiency of DIY solar projects. Factors like average sunlight hours, solar irradiance, and local weather patterns all influence energy production. Consult solar resource maps and consider local weather data when planning your system.
What are the cost savings from DIY solar?
The cost savings from DIY solar can be substantial. By installing your own system, you can avoid the labor costs associated with professional installation, which can account for a significant portion of the overall cost. Over the lifespan of the system, you'll also save money on your electricity bills.
Are solar kits worth it?
Solar kits can be a great option for DIYers, especially those new to solar. They provide a convenient and cost-effective way to get started, with all the necessary components included. However, it's important to choose a kit that meets your specific energy needs and budget.
What are the common solar DIY mistakes?
Common DIY solar mistakes include improper wiring, inadequate grounding, insufficient system sizing, failure to obtain necessary permits, and neglecting safety precautions. Careful planning, attention to detail, and consulting with professionals when needed can help you avoid these mistakes.
How to ensure DIY solar safety?
Prioritize safety by wearing appropriate PPE, working with a partner, never working on energized components, and consulting with a qualified electrician if you're unsure about any aspect of the installation. Follow all local electrical codes and obtain necessary permits to ensure the safety and legality of your system.
How can I improve my DIY solar efficiency?
Improve your DIY solar efficiency by ensuring your panels are properly oriented and free of shading. Regularly clean the panels to remove dust and debris. Monitor your system's performance over time to identify any issues and optimize its efficiency. Consider adding battery storage to maximize self-consumption of solar energy.
Taking control of your energy future with DIY solar installation is a rewarding journey. By following this step-by-step guide and prioritizing safety, you can build a solar system that meets your needs, saves you money, and reduces your environmental impact. Now, take that first step: research local solar incentives and net metering programs in your area. You might be surprised at how much more affordable your DIY solar project can be!
Post a Comment for "DIY Solar Installation: Step-by-Step with Safety Tips"