DIY Solar Panel Mount: Strong and Affordable
The promise of free electricity humming from the sun is alluring, but the reality of sky-high solar panel installation costs can quickly dim that excitement. But what if you could drastically reduce those upfront expenses while still harnessing the sun's power? Building a DIY solar panel mount that’s strong and affordable unlocks that possibility, putting energy independence and significant savings well within reach for the average homeowner or DIY enthusiast.
Lower costs are, of course, a major draw for DIY solar. But building your own mounting system offers so much more. It gives you complete control over the design, allowing you to customize it for optimal sun exposure, aesthetics, and the specific needs of your property. This control can be especially important if you have a non-standard roof, limited ground space, or want to seamlessly integrate solar into your existing landscaping. Plus, the process itself is incredibly rewarding. Learning the fundamentals of solar panel installation and construction empowers you to troubleshoot issues, expand your system later, and truly own your energy production.
One simple step you can take today is to assess your site's solar potential. Use a free online solar calculator to determine the ideal panel orientation (azimuth and tilt) for maximizing sunlight capture based on your location's latitude and typical weather patterns. This information is essential for designing an effective DIY solar panel mount.
DIY Solar Panel Mount: Planning and Preparation
Embarking on a DIY solar project, especially building your own panel mount, requires careful planning. The savings can be significant, but safety and code compliance are paramount. Neglecting either can lead to costly repairs, voided warranties, or even dangerous situations. Start by thoroughly researching local building codes and permitting requirements related to solar panel installations. This is not an area to cut corners; ensure your design meets all necessary safety standards.
Next, determine the number of solar panels you plan to install and their dimensions. This will dictate the size and load-bearing capacity of your DIY solar panel mount. Consider the long-term. Do you plan to expand your solar array in the future? Designing your mount with future expansion in mind can save you time and money later. Don't forget to factor in the weight of the panels themselves, as well as potential snow or wind loads, which can vary dramatically depending on your region. For example, areas with heavy snowfall require a much sturdier and angled mount to prevent damage.
Finally, create a detailed plan or schematic of your mount. This should include precise measurements, materials lists, and step-by-step assembly instructions. Treat this like a professional engineering project to ensure accuracy and safety. Several online resources offer free CAD software or templates that can assist with this process. Remember to over-engineer rather than under-engineer.
Choosing the Right Materials
The materials you select for your DIY solar panel mount will significantly impact its strength, durability, and affordability. Pressure-treated lumber is a popular option for ground-mounted systems, as it's resistant to rot and insect damage. However, steel is often preferred for roof-mounted systems due to its superior strength and ability to withstand high winds.
Consider using reclaimed materials whenever possible to further reduce costs and minimize your environmental impact. For example, repurposing old scaffolding or metal pipes can be a cost-effective and sustainable solution. Just be sure to thoroughly inspect any reclaimed materials for structural integrity before using them. Remember to properly treat and seal any lumber to prevent weather damage and prolong the lifespan of your mount.
Tools and Safety Gear
Assembling a strong and affordable DIY solar panel mount requires the right tools and safety gear. At a minimum, you'll need a drill, saw, measuring tape, level, wrench set, and safety glasses. Depending on the materials you choose, you may also need a welding machine or metal-cutting tools.
Safety should always be your top priority. Wear safety glasses, gloves, and appropriate footwear at all times. If you're working on a roof, use a safety harness and lifeline. Never work alone, and always inform someone of your plans before starting the project. If you are unsure about any aspect of the construction process, consult with a qualified professional.
DIY Solar Panel Mount: Construction and Installation
Once you have your plan, materials, and tools, it's time to start building your DIY solar panel mount. The construction process will vary depending on the type of mount you're building (ground-mounted, roof-mounted, or pole-mounted), but the basic principles remain the same.
First, assemble the main frame of the mount. This is the structural foundation that will support the solar panels. Ensure that all connections are strong and secure. Use appropriate fasteners (bolts, screws, or welds) to join the different components together. For ground-mounted systems, consider using concrete footings to provide a stable base. For roof-mounted systems, use flashing to prevent water damage around the mounting points.
Next, attach the mounting rails or brackets to the frame. These are the components that will directly hold the solar panels. Ensure that the rails are level and properly spaced to accommodate the panels. Use stainless steel hardware to prevent corrosion. Finally, carefully install the solar panels onto the mounting rails. Secure them tightly with clamps or bolts. Double-check all connections before energizing the system.
Remember, electricity and solar panels can be dangerous. If you're not comfortable working with electrical wiring, hire a qualified electrician to connect the panels to your electrical system. Poor wiring can lead to inefficient systems and dangerous fire hazards.
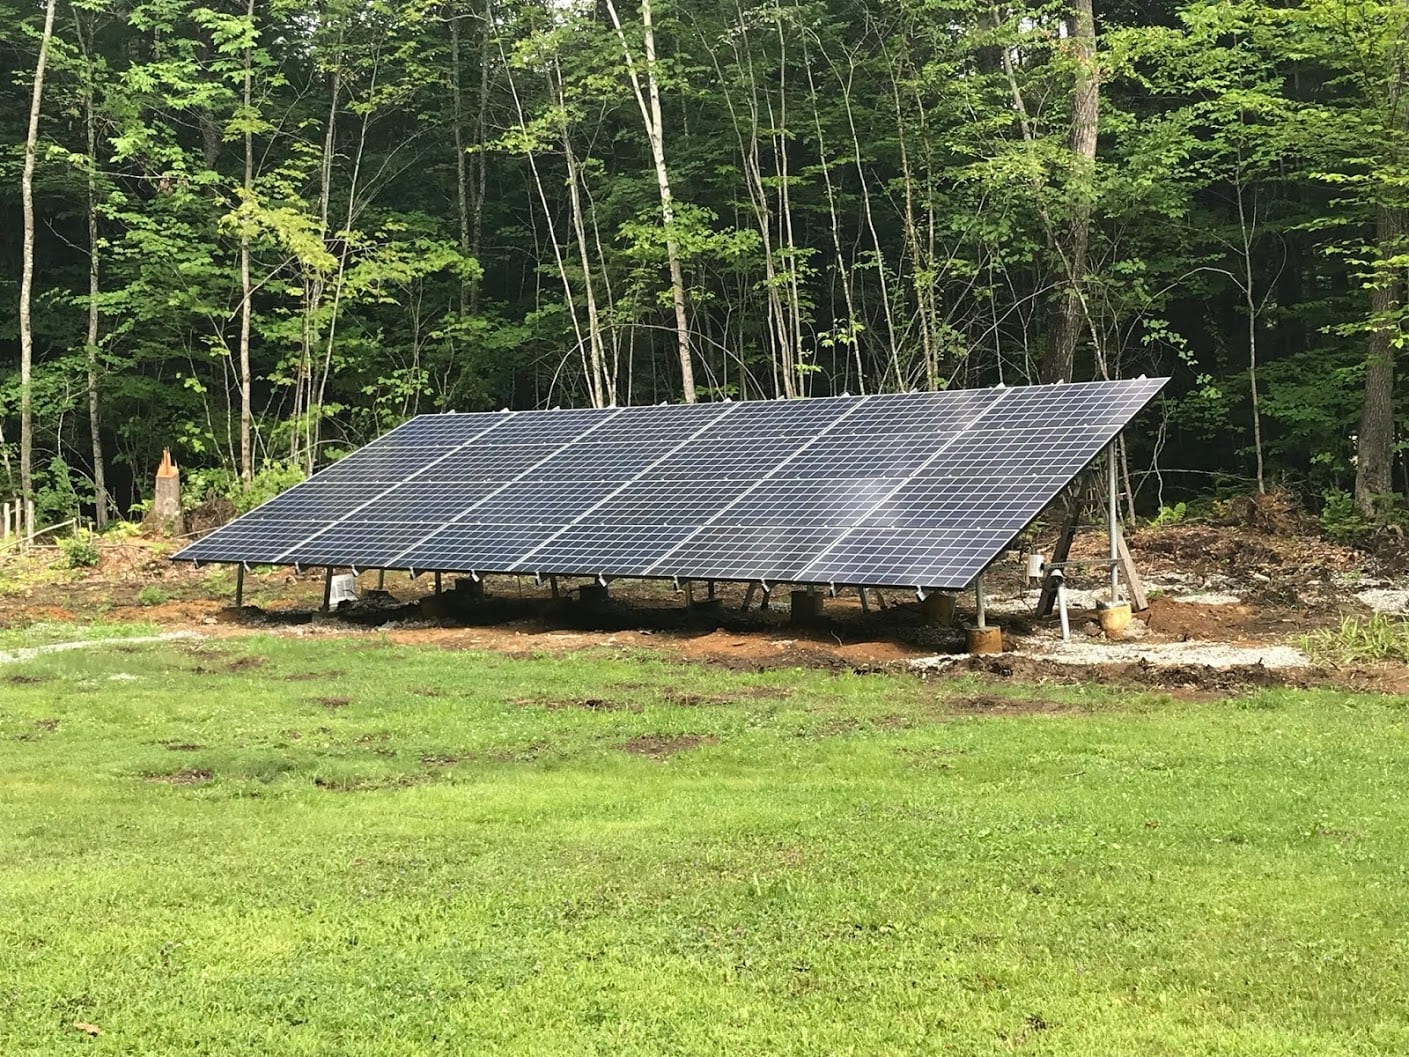
Ground Mounts vs. Roof Mounts
Deciding between a ground mount and a roof mount depends on your property and preferences. Ground mounts offer easier access for maintenance and cleaning, and you can adjust the angle seasonally for maximum solar capture. They also avoid roof penetrations. However, they take up ground space and can be more susceptible to shading from trees or buildings.
Roof mounts are generally less visible and don't require dedicated ground space. But they can be more challenging to install and maintain, especially on steep or complex roofs. Also, ensure your roof can handle the weight of the panels and the mounting system. Regularly inspect roof mounts for leaks and structural integrity, especially after severe weather.
Optimizing for Seasonal Changes
One of the advantages of a DIY solar panel mount is the ability to adjust the angle of the panels to optimize for seasonal changes. During the summer, when the sun is higher in the sky, a lower tilt angle is ideal. In the winter, when the sun is lower, a steeper tilt angle will maximize sunlight capture. Building an adjustable mount allows you to fine-tune your system for maximum energy production throughout the year. This can significantly increase your overall solar energy yield, especially in regions with distinct seasons.
Maintaining Your DIY Solar Setup
Even a strong and affordable DIY solar panel mount requires regular maintenance to ensure optimal performance and longevity. Periodically inspect the mount for signs of rust, corrosion, or damage. Tighten any loose bolts or screws. Clean the solar panels regularly to remove dirt, dust, and debris. A simple rinse with water is usually sufficient, but you may need to use a mild detergent for stubborn stains.
Also, monitor the performance of your solar system. Check the output of your panels regularly and compare it to historical data. A sudden drop in performance could indicate a problem with the panels, wiring, or mounting system. Address any issues promptly to prevent further damage and maintain maximum energy production. Pay close attention to the inverter; this crucial component converts DC electricity from the panels to AC for household use, and it's often the first to show signs of wear or failure.
Recognizing and Addressing Common Issues
Several common issues can arise with DIY solar setups, including low energy output, wiring mistakes, and poor panel orientation. Low energy output could be caused by shading, dirty panels, or a faulty inverter. Wiring mistakes can lead to short circuits, voltage drops, or even fires. Poor panel orientation can significantly reduce the amount of sunlight captured.
If you experience any of these issues, troubleshoot the system systematically. Start by checking the wiring connections and panel orientation. Clean the panels thoroughly and inspect them for damage. Use a multimeter to test the voltage and current of the panels and inverter. If you're unable to resolve the issue yourself, consult with a qualified solar technician.
Long-Term Cost Savings and Benefits
The initial investment in a DIY solar panel mount may seem significant, but the long-term cost savings and benefits are substantial. By generating your own electricity, you can significantly reduce or even eliminate your monthly utility bills. You'll also be less dependent on the grid and more resilient to power outages. Over time, the savings from reduced electricity bills will more than offset the initial cost of the system.
In addition to the financial benefits, DIY solar offers environmental advantages. By using clean, renewable energy, you'll reduce your carbon footprint and contribute to a more sustainable future. Plus, the satisfaction of building your own solar system and generating your own electricity is truly rewarding.
FAQ: DIY Solar Panel Mounts
What permits do I need for a DIY solar panel mount?
Permitting varies widely by location. Contact your local building department to inquire about specific requirements for solar panel installations. Generally, you'll need a building permit and possibly an electrical permit. Failing to obtain the necessary permits can result in fines or even the removal of your system.
How much does it cost to build a DIY solar panel mount?
The cost of a DIY solar panel mount depends on the size of your system, the materials you use, and your construction skills. A simple ground mount for a few panels could cost as little as $100-$300, while a more complex roof mount for a larger system could cost $500-$1,000 or more. Reclaimed materials can significantly reduce these costs.
Can I build a DIY solar panel mount on any roof?
Not necessarily. Some roofs may not be suitable for solar panel installations due to their age, condition, or orientation. Consult with a structural engineer or qualified solar installer to assess the suitability of your roof. Ensure the roof can handle the weight of the panels and the mounting system. Roof pitch and material play a major role. A flat roof simplifies things, while slate presents a challenge.
How long will a DIY solar panel mount last?
The lifespan of a DIY solar panel mount depends on the quality of the materials and the construction techniques used. A well-built mount using durable materials like steel or pressure-treated lumber can last for 20 years or more. Regular maintenance and inspections are essential for prolonging the lifespan of your mount.
Is it safe to install a DIY solar panel mount?
Installing a DIY solar panel mount can be dangerous if you don't take proper precautions. Work at heights, electrical wiring, and heavy materials all pose potential hazards. Use appropriate safety gear, follow safe work practices, and consult with qualified professionals if you're unsure about any aspect of the installation process.
How can I maximize the efficiency of my DIY solar panel system?
Maximize efficiency by optimizing panel orientation, minimizing shading, and using high-efficiency solar panels. Regularly clean the panels to remove dirt and debris. Monitor the performance of your system and address any issues promptly. Consider adding battery storage to capture excess energy and use it when the sun isn't shining.
Taking the plunge into DIY solar with a strong and affordable DIY solar panel mount is a game-changer. Why not start researching local solar rebates and incentives today? Many states and utilities offer financial assistance that can significantly lower your upfront costs, making your renewable energy dreams even more attainable.
Post a Comment for "DIY Solar Panel Mount: Strong and Affordable"