DIY Solar System for Home: A Step-by-Step Guide
Imagine a future where your energy bills shrink dramatically, and you’re less reliant on the power grid. That future is within reach with a DIY solar system for home. Harnessing the sun's energy to power your life is not just environmentally responsible; it’s also a savvy financial move, offering long-term savings and a satisfying sense of self-sufficiency.
Embarking on a DIY solar project matters for several reasons. First, it puts you in control of your energy costs. By generating your own electricity, you shield yourself from fluctuating utility prices. Second, it empowers you to reduce your carbon footprint, contributing to a cleaner planet. Finally, a DIY approach allows you to tailor the system to your specific energy needs and budget. Whether you're aiming for complete energy independence or simply supplementing your grid power, understanding the steps involved is crucial.
Before you even buy your first solar panel, take a walk around your property on a sunny day. Note which areas get the most direct sunlight throughout the day. This simple observation will be invaluable when planning your panel placement for maximum energy generation.
DIY Solar System for Home: A Step-by-Step Guide
Getting started with a DIY solar system for home might seem daunting, but breaking it down into manageable steps makes it achievable. This guide covers the basics, from planning and permits to installation and maintenance, ensuring you can confidently harness the power of the sun. Remember to always prioritize safety and consult with qualified professionals when needed.
Step 1: Assessing Your Energy Needs and Goals
The first step is to determine how much electricity you currently use. Review your past utility bills to calculate your average monthly energy consumption in kilowatt-hours (k Wh). This will help you estimate the size of the solar system you’ll need. Next, define your goals. Are you aiming to completely eliminate your electricity bill (off-grid living), or do you simply want to reduce your reliance on the grid (grid-tied system)? Your goals will dictate the type of system you choose and the amount of money you’ll need to invest.
Step 2: Choosing the Right Components
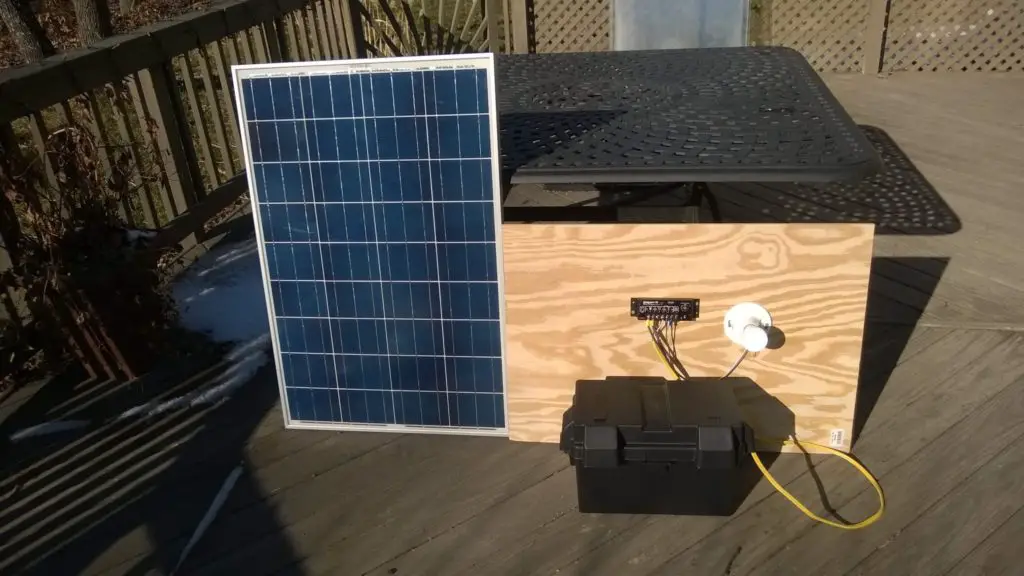
A typical DIY solar system consists of solar panels, an inverter, charge controller (for battery-based systems), batteries (for off-grid or backup power), wiring, and mounting hardware. Solar panels convert sunlight into DC electricity. Inverters convert DC electricity into AC electricity, which is what most household appliances use. Charge controllers regulate the flow of electricity from the solar panels to the batteries, preventing overcharging. Batteries store excess energy for use when the sun isn’t shining. Select components based on your energy needs, budget, and available space. Research different brands and models to find the best combination of efficiency, durability, and affordability. Consider buying a pre-packaged solar kit, especially if you're a beginner. These kits bundle all the necessary components together, simplifying the selection process.
Step 3: Obtaining Permits and Approvals
Before you start any installation work, check with your local building department about permit requirements. Many jurisdictions require permits for solar installations, even for small DIY projects. Obtaining the necessary permits ensures that your system complies with safety regulations and building codes. Failure to obtain permits can result in fines or even the forced removal of your system. This also applies to neighborhood associations, where HOA approval may be needed.
Step 4: Installing the Solar Panels
Panel installation is the most labor-intensive part of the process. Choose a location that receives ample sunlight throughout the day, ideally facing south (in the Northern Hemisphere). Mounting the panels securely is critical for their longevity and safety. You can mount them on your roof, on the ground, or on a pole. Follow the manufacturer's instructions carefully and use appropriate hardware. Securely attach the mounting brackets to your chosen surface. Then, carefully lift and attach the solar panels to the brackets, ensuring they are properly aligned and tightened. When working on a roof, always prioritize safety and use appropriate fall protection equipment.
Step 5: Wiring the System
Wiring your solar system requires careful attention to detail and a thorough understanding of electrical safety. Connect the solar panels in series or parallel, depending on your system's voltage requirements. Use appropriate gauge wiring and weatherproof connectors. Run the wiring from the solar panels to the inverter and charge controller (if applicable). Ensure all connections are secure and properly insulated. If you're not comfortable working with electricity, consider hiring a qualified electrician to handle the wiring. Improper wiring can lead to system malfunctions, electrical shocks, or even fires.
Step 6: Connecting the Inverter and Batteries
The inverter converts the DC electricity from the solar panels (or batteries) into AC electricity that can be used by your appliances. Connect the inverter to the solar panels or batteries, following the manufacturer's instructions. If you're using batteries, connect them to the charge controller and then to the inverter. Ensure all connections are secure and properly grounded. Double-check the polarity of the connections to avoid damaging the equipment.
Step 7: Testing and Monitoring
Once the system is installed and wired, it’s time to test it. Turn on the inverter and check the output voltage and current. Monitor the system's performance over time to ensure it’s generating the expected amount of electricity. Use a solar monitoring system or app to track your energy production and consumption. Regularly inspect the system for any signs of damage or wear. Keep the solar panels clean to maximize their efficiency.
Optimizing Your DIY Solar System for Home
Beyond the initial installation, optimizing your DIY solar system for home is key to maximizing its efficiency and longevity. Consider these tips: Seasonal Adjustments: Adjust the angle of your solar panels seasonally to capture the most sunlight. Energy Efficiency: Reduce your overall energy consumption by using energy-efficient appliances and lighting. Battery Maintenance: Regularly check the condition of your batteries and follow the manufacturer's recommendations for maintenance. Shading: Trim trees or remove any obstacles that might be shading your solar panels.
Troubleshooting Common DIY Solar System Issues
Even with careful planning and installation, you might encounter some issues with your DIY solar system. Here are some common problems and solutions: Low Energy Production: Check for shading, dirty panels, or faulty wiring. Inverter Problems: Consult the inverter's manual for troubleshooting steps. Battery Issues: Check the battery voltage and electrolyte levels. Wiring Problems: Inspect all connections for loose or corroded wires. Grid-Tie Issues:Make sure the grid-tie inverter is communicating properly with the utility grid.
Off-Grid Solar Setups and Solar Kits
For those seeking complete energy independence, an off-grid solar setup is the answer. These systems rely solely on solar power and battery storage, eliminating the need for a grid connection. Off-grid systems are more complex and expensive than grid-tied systems, but they offer unparalleled freedom and self-reliance. Solar kits, which include all the necessary components, can simplify the process of setting up an off-grid system. These kits are available in various sizes and configurations to suit different energy needs. They often include detailed instructions and support, making them a good option for beginners. Whether you're powering a remote cabin or an entire home, an off-grid solar system can provide a reliable and sustainable source of electricity.
Understanding Net Metering
Net metering is a policy that allows homeowners with solar panels to receive credit on their electricity bills for the excess energy they send back to the grid. If your DIY solar system generates more electricity than you consume, the excess is sent back to the grid, and your utility company credits your account. This can significantly reduce your electricity bill and even result in a net credit, meaning the utility company pays you for the electricity you provide.
Region-Specific Solar Considerations
The effectiveness of your DIY solar system for home will vary depending on your geographical location and climate. Regions with more sunlight hours will naturally generate more electricity. In colder climates, snow accumulation on solar panels can reduce their efficiency. Choose solar panels and mounting systems that are designed to withstand the specific weather conditions in your area. Understanding these region-specific considerations will help you optimize your system's performance and ensure its longevity.
DIY Solar System for Home: FAQ
How much does it cost to install a DIY solar system for home?
The cost of a DIY solar system varies greatly depending on the size, components, and complexity of the project. A small, basic system can cost as little as a few hundred dollars, while a larger, off-grid system can cost several thousand. Solar kits offer a more predictable cost, typically ranging from $500 to $5,000, depending on their capacity.
Can I install a DIY solar system on my rental property?
Typically, you'll need permission from your landlord or property owner before installing a DIY solar system on a rental property. Portable solar panels or small balcony systems are often more suitable for renters, as they can be easily moved when you relocate.
What tools do I need for a DIY solar installation?
You'll need a basic set of tools, including a drill, screwdriver, wrench, wire stripper, multimeter, and safety glasses. Depending on the complexity of the installation, you might also need a ladder, level, and specialized crimping tools for solar connectors. A voltage tester is important for confirming the power is off when working with electricity.
How long does it take to install a DIY solar system?
The installation time varies depending on the size and complexity of the system. A small, portable system can be installed in a few hours, while a larger, roof-mounted system can take several days or even weeks to complete. Proper planning and preparation can significantly reduce the installation time. It's also a good idea to involve a friend or family member to assist with the installation.
How much maintenance does a DIY solar system require?
Solar panels require minimal maintenance. Regularly clean them with water and a soft brush to remove dirt and debris. Inspect the wiring and connections periodically for any signs of damage or corrosion. Batteries may require more frequent maintenance, such as checking the electrolyte levels and cleaning the terminals.
Are there any tax credits or incentives for DIY solar installations?
Many governments offer tax credits or incentives for solar installations, even for DIY projects. Check with your local and federal government agencies for available programs. These incentives can significantly reduce the overall cost of your solar system and make it even more affordable.
Ready to take the plunge into DIY solar? Start by calculating your energy consumption and researching the components you’ll need. Even a small investment in a basic solar setup can be a great learning experience and a step towards energy independence. Begin small, learn as you go, and watch your renewable energy savings grow over time.
Post a Comment for "DIY Solar System for Home: A Step-by-Step Guide"